.png)
An allowance is the specified dollar amount that an individual user, or a group of users, is allowed to spend for a given transaction, day, week, or month. These can be configured so that every user in the organization adheres to a particular allowance setup or each user can be configured on a case-by-case basis. When a purchase exceeds a user's allowance, it goes into Pending Requisition status and requires the approval of a user with a higher allowance level (usually a general manager or corporate personnel).
Allowance options are available and can be applied to any vendor, user, product type or product on the system. Allowances are typically administered for a specific period of time and denoted by a dollar amount. For instance, user A has an allowance of $100,000 for a one week period. Any purchases made that exceed the indicated dollar amount go into requisition status and require the approval of a designated user.
Creating an Allowance Category
To apply an allowance category, there are multiple settings and preferences available to select. Below are the steps to creating an allowance as well as a detailed list of each setting and its purpose.
-
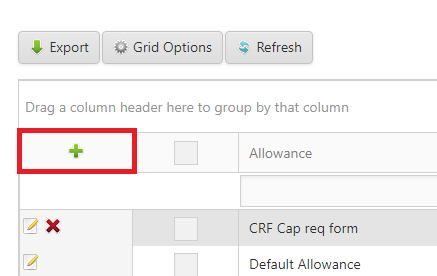
Go to View > Account Setup > Allowance Categories.
-
Click the green plus sign.
-
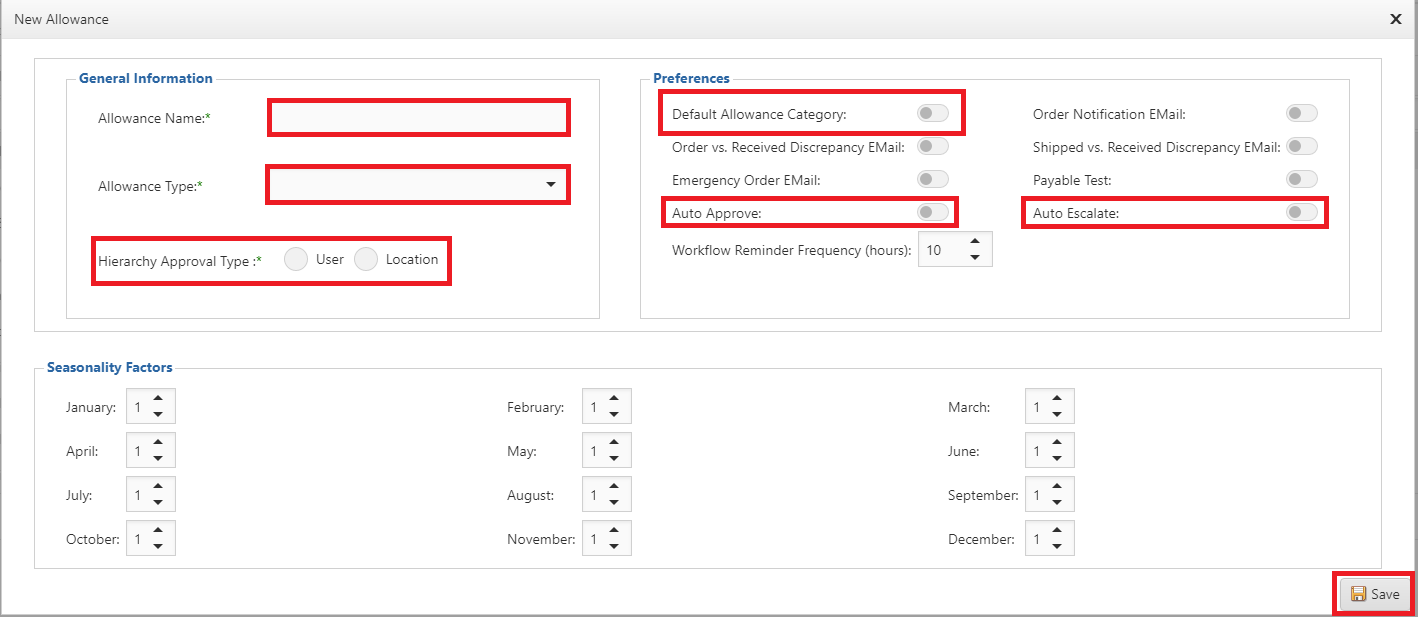
Allowance Name - Choose a name that signifies the purpose of the allowance.
-
For example: Concessions Allowance, Janitorial Supplies, Acme Vendor Allowance
-
Required
-
-
Allowance Type - Setting to determine a category for the proposed allowance. Category choices include:
-
Item - An Item Allowance is used to control spending on designated items. When selected, items must be assigned to the category using the Approved Items Screen or uploaded through the Advanced Upload Screen.
-
Category- The Category allowance is used to control spending on products within a Designated Category.
-
Supplier - The Supplier allowance is used to control spending on products sold or distributed by a Specific Supplier.
-
GL Account - The GL Account allowance is used to control spending on products within a Designated GL Account.
-
Budget - The Budget Allowance is used to control spending on products for a Designated Budget. Select from the following Aggregate Options:
-
Non-Cumulative - Allowance is limited to Each Budgeted Period.
-
Cumulative-Current Period - Allowance is limited to All Previous and Current Periods. Allows a user to Place an Order for a Future Period as long as the order does not exceed the cumulative amount of all previous periods and the current period.
-
Cumulative-All Periods - Allowance is limited to All Budgeted Periods.
-
-
Project - The Project allowance is used to control spending on products for a Designated Project.
-
-
Hierarchy Approval Type - Choose whether the approval hierarchy will be dependent upon the location setup or an arrangement of users.
-
Location - This type of approval setup designates each location with a certain allowance level and, if exceeded, orders from all locations will go to the same users for approval. Please note Important notice below.
-
User - Each user is assigned an allowance total, and if exceeded, the order will go to the next user up the ladder for approval. This will continue to escalate until it is approved by a user with an allowance greater than or equal to the order total.
-
-
Default Allowance Category - By setting the flag to On, any product that does not fall into a previously created allowance will use the default allowance.
-
Auto Approve Order - This option allows an order, even if it exceeds the allowance set, to be transmitted to the Supplier. A notification will be sent to the approval person informing them that a user exceeded their allowance. The approval person can be a region or corporate manager.
-
Auto Approve Payables - This option allows a payable, even if it exceeds the allowance set, to be automatically approved and proceed to the next step in the workflow. A notification will be sent to the approval person informing them that a user exceeded their allowance. *Note: the setting Payable Test must also be turned on.
-
Auto Escalate - This option is best suited when there are multiple levels of approval. When a user exceeds their allowance, the order will go into requisition. A notification is sent to the final approval person, rather than scaling the allowance hierarchy. When turned on the purchase will jump to the approver with enough spending power to approve.
-
Exclusive - When toggled on, any items that fall into the given Allowance Category will be ignored should it be the reason another category is checked. Take for example two Allowance Categories - one based on Supplier and other based on GL Account. If you mark the Supplier category as Exclusive, then an item that falls into the GL Account category would cause that category to be ignored as part of the allowance testing sequence. If both categories were marked Exclusive, the one with the higher allowance limit would prevail.
-
Click Save.
Important
When a Location Hierarchy Approval is marked as a default allowance, any location not assigned to that allowance will automatically be assigned when an order is placed and tested against the allowance. The limit on that location will be $1,000,000 with the approver set as the default corporate approval user.
Approval Person
The Approval Person is set up to allow orders to be approved by the department head before going to the GM for final approval.
To set up an Approval Person you must first go the user that needs their orders approved.
-
View > Account Setup > Users.
-
Search for and select the user that needs their orders approved.
-
Click the pencil icon to Edit.
-
Select the Allowance Detail tab.
-
Find the allowance for this user that needs a new approval person > click the ellipsis > search for the new approval person.
-
Click Save.
Note
Only Region and Corporate level User have the ability to set a Backup User. Contact support for assistance, if needed.
Backup Person
The Backup Person feature was put into place so that when a GM is unable to approve orders, they can set up a Backup Personto approve orders until the GM resumes his duties. When the Backup Person is assigned they will have the same buying power as the GM.
-
View > Account Setup > Users.
-
Use the column headers to search for the user who needs a backup.
-
Click the pencil icon to Edit.
-
Select the Allowance Detail tab.
-
Click the ellipsis in the Backup Person box.
-
Use the Search Tool in the popup window to search for your backup person, then click their name to select that user.
-
Use the Start Date and End Date boxes to define the period when the backup person will be active.
-
Click Save.
Backup Person Functions:
-
Access the requisitions of the absent person via the requisition list.
-
Included in the requisition notification email and requisition reminder notification email of the absent person.
-
Assume the max of his/her level or the level of the absent person for the purposes of approving the requisition.
-
Associated as the approval person of the requisition if the backup person indeed approves the requisition. The assumed authorization level and buying power amounts will be associated with the approved requisition.