Approved Items
Sorting capabilities on column headers have been disabled. If you need to sort / filter data please export the approved items screen and use Excel’s sorting and filtering capabilities.
The Approved Items list, also known as the Buyer Approved Items list, is a collection of products that an organization has authorized for purchase. This list includes buyer information specific to each item. It's important to understand that this list may not include all items available in the system for all suppliers.
This documentation will explain how to use the Approved Items editor, which allows you to customize various details of an item:
Item Information: Edit basic details about an item.
Pricing/Contracts: Adjust pricing details for an item.
Order Guides: Control which Order Guides an item is associated with.
Inventory: Review and manage inventory details for an item.
Location Overrides: Modify location-specific information for an item when the default settings do not apply.
By utilizing the Approved Items editor, you can efficiently manage and update essential information about approved items within your organization.
Approving an Item
Before making any edits to the information provided, let's first review how items are approved for use. There are several ways in which an item can be designated as an Approved Item.
One common method is by including the item in an Agreement with a Vendor or Distributor. More information on Agreements can be found in this article.
Another way for items to be approved is through electronic invoicing, either through EDI or Scan & Capture. Items can be automatically added and approved in the system during the electronic invoicing process.
Lastly, items can become Approved Items when a Corporate User locates the item in the Product Catalog and marks it as Available.
Editing an Approved Item
Select View > Account Setup > Approved Items and search for the item that needs to be changed. When searching for an item you can search by Item Name, Sourced By, Item #, UOM (Unit of Measure), Buyer #, GL Account.
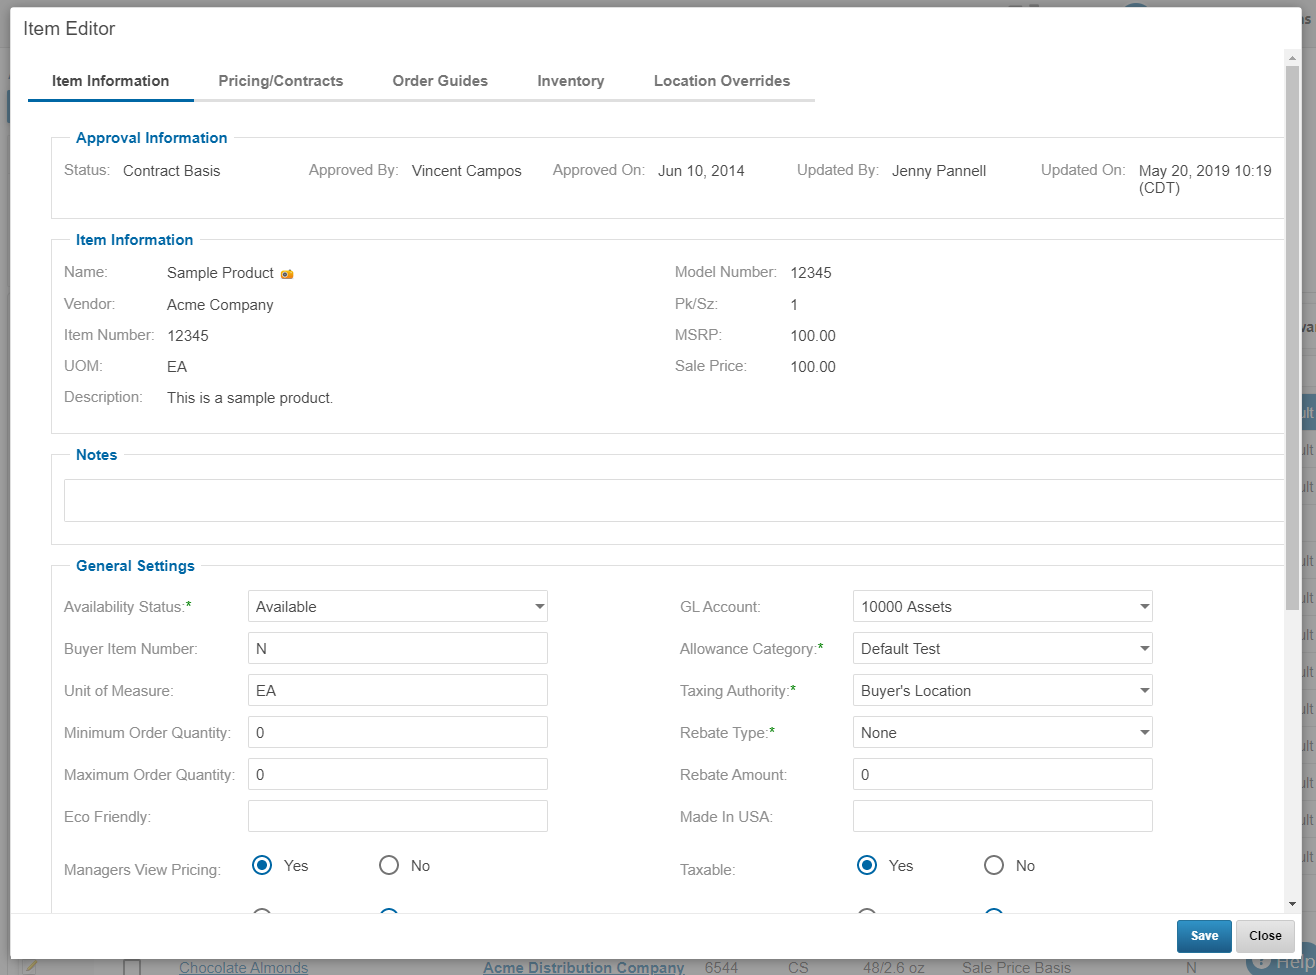
Click the Pencil Icon to launch the Item Editor


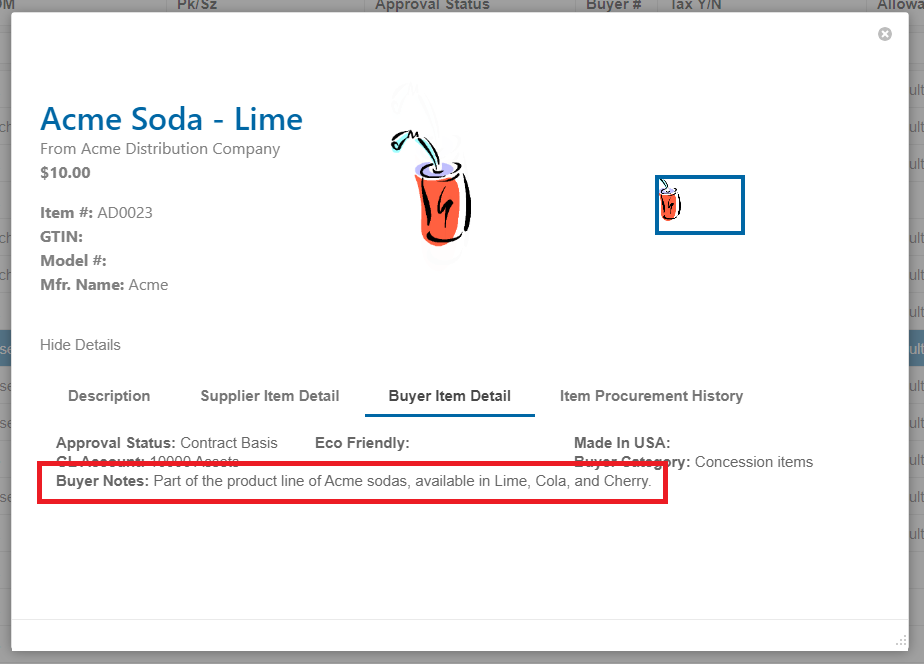
Notes
In the text box under the Notes section, enter any text you would like to appear on the additional item information panels that appear in various places throughout the system, as shown below.

General Settings
In the General Settings section of the Item Editor, you can modify various aspects of an item. Here is a breakdown of the different settings:
Availability Status: This setting controls whether an item is visible for purchase through different methods.
GL Account: Used to preset the GL Account for ordering or receiving.
Buyer Item Number: The buyer's specific number for an item, used for matching products in inventory.
Allowance Category: Assigns the item to a specific Allowance Category, limited to Product type Allowance Categories.
Unit of Measure: The unit of measure used by the buyer to describe the product.
Taxable: Determines if tax should be calculated when the item is ordered.
Taxing Authority: Specifies the tax jurisdiction used for computing taxes on an order.
Minimum/Maximum Order Quantity: Sets the minimum and maximum quantities allowed for an item on an order.
Rebate Type/Amount: Displays the Estimated Rebate Amount during the ordering process.
Managers View Pricing: Controls if Location Level users can view pricing during the ordering process.
Track as Asset: Works with the Asset Management module.
Repair/Exchange Item: Describes if the item is part of a return or exchange program.
Data Flex Fields: Additional data fields on the page with labels specific to organizational use.
Click the Save button at the bottom of the page. If no changes are made, you can click the Close button to close the editor.
Pricing
If pricing changes are necessary, switch the Pricing/Contracts tab at the top of the editor.
Review the Pricing Contracts section and determine which Vendor or Distributor Contract should be changed. Click on the Unit Price for that contract.
On the Contract Product Edit popup, double-click on the Amt. or % cell under the Proposed Pricing Information section and enter a new price.
Scroll to the bottom of the form and click Approve.
If no changes are necessary, you can click the Close button to close the editor; otherwise, continue to the next section.
Order Guides
If Order Guide changes are necessary, click on the Order Guides tab at the top of the editor. Any Order Guides the item is currently on will appear in the list of the resulting popup.
If you wish to add this item to another Order Guide, click on the green plus sign to select an Order Guide. If you wish to remove this item from an Order Guide, skip to Step 11.
On the Order Guide Selector, check the new Order Guide and click the Save button when done.
To remove the item from an Order Guide, click the red X.
If no changes are necessary, you can click the Close button to close the editor; otherwise, continue to the next section.
Moving Related Inventory
If this item requires changes to inventory transactions, click on the Inventory tab at the top of the editor to reveal a list of locations that have inventory transactions related to the selected item.
Expand any row under a location to reveal any related transactions.
If you would like to re-associate any inventory transactions with another item, click on the Inventory Maintenance button on the button bar at the top of the screen.
On the Inventory Maintenance popup, select a Destination Item that all transactions should be linked to and click the Move Item's Inventory button.
If no changes are necessary, you can click the Close button to close the editor; otherwise, continue to the next section.
Location Overrides
If the selected item has values for a specific location that differs from the default values under the Item Information tab, click on the Location Overrides tab.
Click on the green plus sign to add a new location override.
Fill out the Override form and click Update when done.
If no changes are necessary, you can click the Close button to close the editor.
.png)