.png)
-
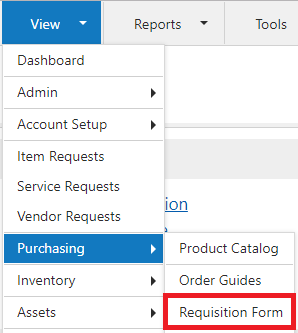
Go to View > Purchasing > Requisition Form.
-
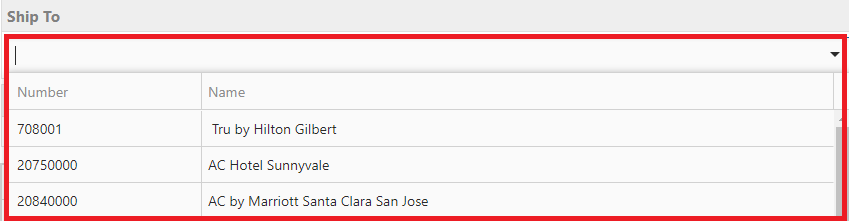
If you have access to more than one location, select the location you are placing an order for from the Ship to drop down list.
-
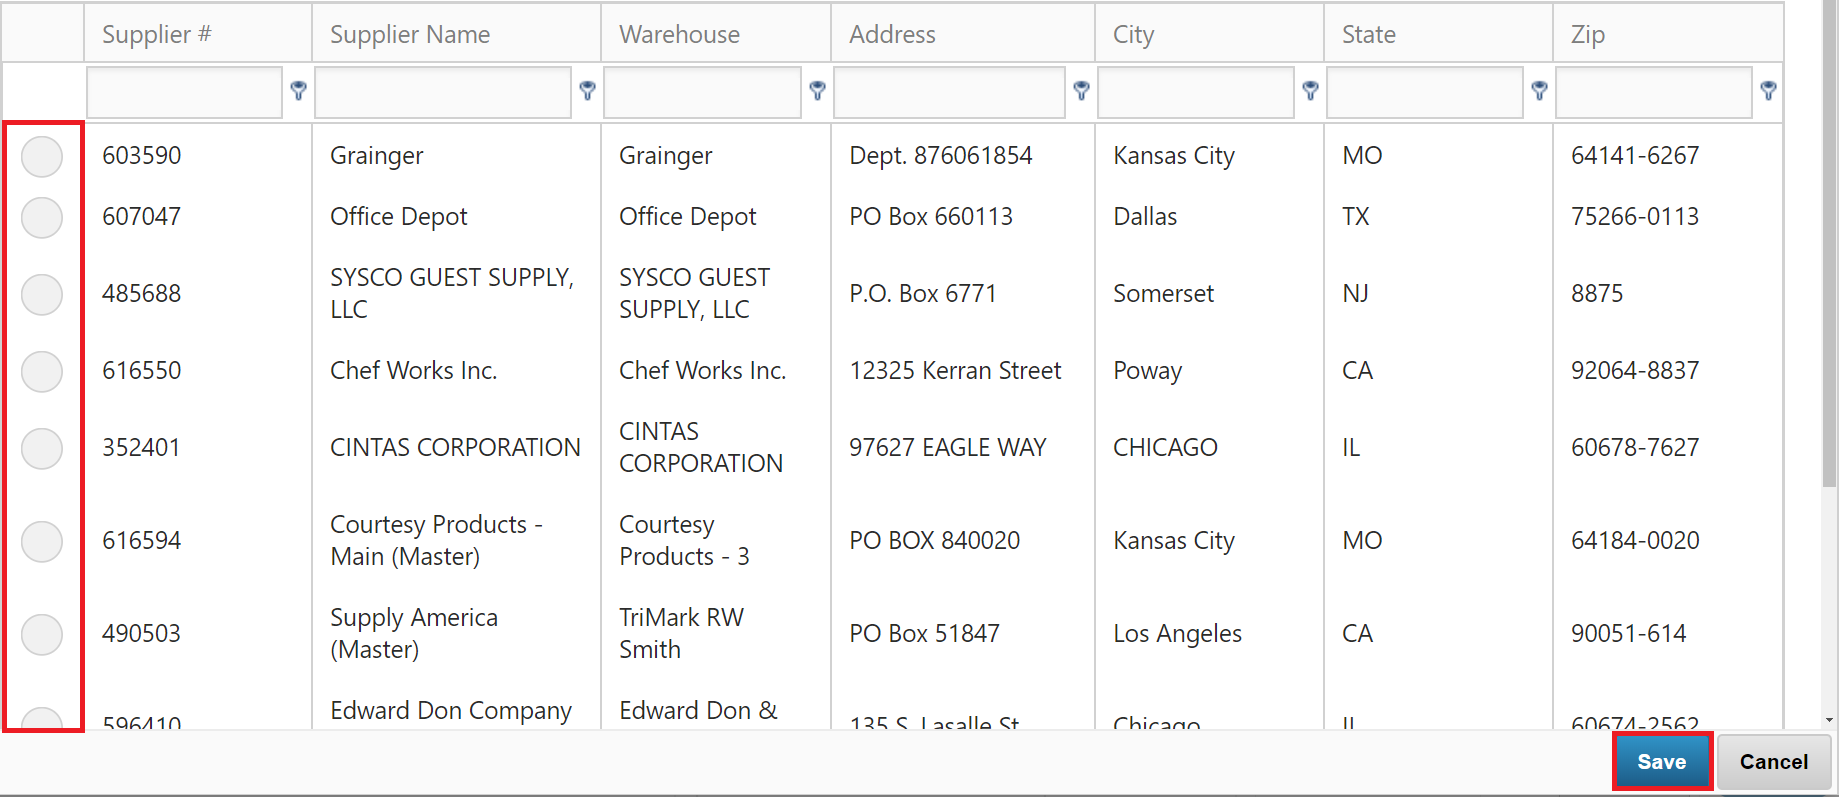
Select a Supplier from the Supplier Selector Window, then Save.
-
By default, the Supplier Selector Window only shows suppliers for which you have purchase history.
-
Search the list by typing in the Supplier Name column. If no results are found, the Supplier Selector Window automatically expands results to include all suppliers used by your organization. The Item Entry Window will pop up. Create your item in this menu.
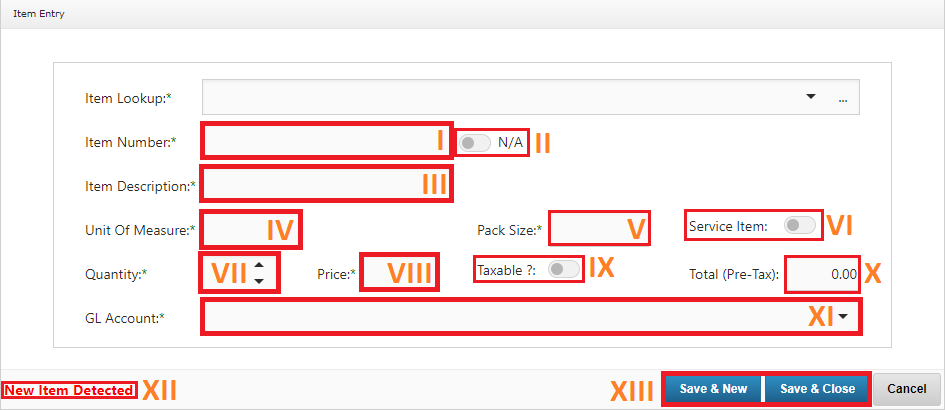
I: Item Number– Enter the new item’s number. Can consist of up to 50 Characters.
II: N/A Toggle – Toggles if the Item Number is To Be Determined. Will label number as “TBD”
III: Item Description – Enter a description of the new item. Can consist of up to 50 Characters.
IV: Unit Of Measure – Enter the new item’s unit of measure. A Unit of Measure is what the item is measured in (Ex. Case, Pack) Will be displayed as UOM on the requisition form.
V: Pack Size – Enter the number of items in the package.
VI: Service Item – Toggles if the item is a service item
VII: Quantity – Enter the amount to be ordered
VII: Price – The price per one unit
IX:Taxable Toggle – Toggles if the item is taxable
X: Total – Total Amount before tax
XI: GL Account – Select a GL Account for the item
XII: New Item Detected Notification – Displays upon making a new item
XII: Saving – “Save & New” will open a new Item Entry screen while saving and adding the old item to the requisition form. “Save & Close” will save the Item Entry screen and save your item to the requisition form.
-
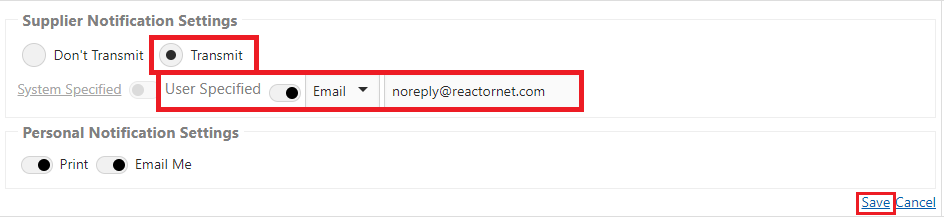
Click Edit next to Notifications.

-
Select Transmit under Supplier Notification Settings, Choose Fax or Email from the User Specified drop down list, Enter the corresponding information in the blank provided.
-
Review this screen to ensure all information is correct the click Review.
-
The Review screen allows you to make a final check of your order then select Save to Cart, Cancel, or Submit.
-
If you want to proceed with this order click Submit.
-
Wait for the Order Confirmation screen which ensures your order has been captured and is processing.