.png)
The EPRO system is capable of importing large amounts of data, such as yearly budgets for an entire organization's portfolio of properties, through advanced uploads. These uploads are normally completed via excel template and are detailed below.
Budget Upload
Uploading budgets is a three step process, which is detailed below. This process consists of creating a shell or an outline for budgets, configuring specific budget details, and assigning locations to a budget.
Step 1 - Upload Budget Template
-
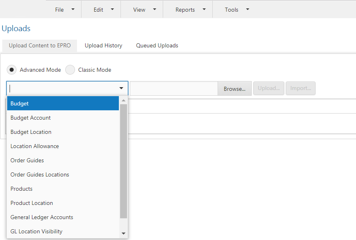
To download the Budget template go to Tools > Uploads > Advanced Mode > click Download import template.
-
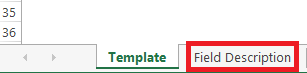
Fill out budget template according to the instructions listed in the Field Description tab.

-
Any optional (gray) columns that are not used need to be deleted.
-
It is recommended that you give the budget a unique name to make it easily identifiable
-
If you have to create multiple budget shells, you may do so in one upload. Each row filled with details will represent one budget shell created.
-
-
Once your budget template is configured, save the file (any naming convention) as an XLS file.
-
Upload the budget template to the EPRO system.
-
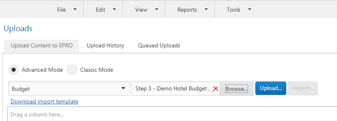
Tools > Upload > Advance Mode > select Budget from the drop down selector.
-
Browse for the file you just created > click Upload.
-
If errors are found during the upload process, there will be error messages in red on the screen. Review the error messages and correct on the budget file previously created. Once any necessary edits are made in the file, re-save and re-upload the file using the steps outlined above.

-
If no errors are found after uploading the budget file, click Import. You will be prompted to be re-directed to the Historytab while the importing of the file runs.
-
Note
Becoming familiar with the GL coding practices of your management group can be beneficial when configuring budget data.
Step 2 - Upload Budget Account Template
-
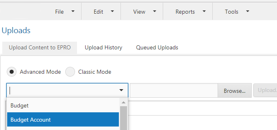
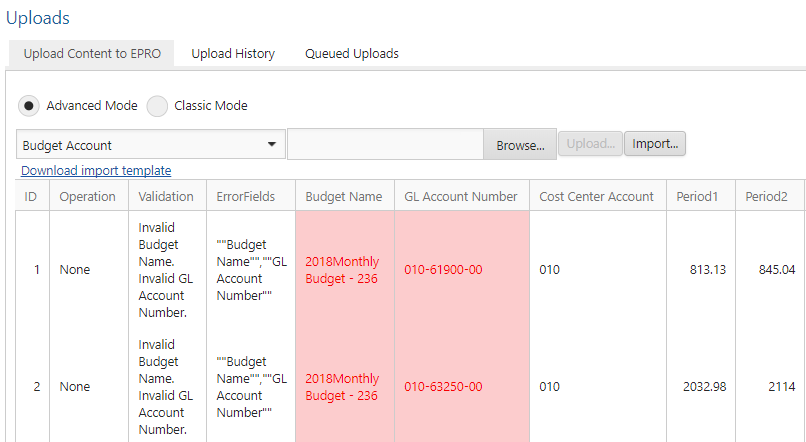
To download the Budget Account template go to Tools > Uploads > Advanced Mode > Budget Account.
-
Fill out the Budget Account template according to the instructions listed in the Field Description tab.
-
The Budget Name must be an exact match to what was loaded in the budget template.
-
The GL Account Number is just the account number portion of the GL code—the account name should not be included in this field.
-
Any optional (gray) columns that are NOT used must be deleted.
-
-
Once your template is configured, save the file (any naming convention) as an XLS file.
-
Upload the template to the EPRO system.
-
Tools > Upload > Advance Mode > select Budget Account from the drop down selector.
-
-
Click Browse > select the file you created > click Upload.
-
If errors are found during the upload process, there will be error messages in red on the screen.
-
-
If no errors are found after uploading the Budget Account file, click Import. You will be prompted to be re-directed to the history tab while the importing of the file runs.
Step 3 - Upload Budget Location Template
-
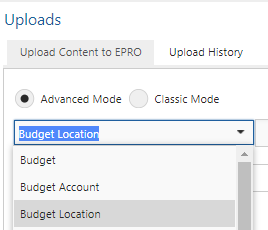
To download the Budget Location template go to Tools > Uploads > Advanced Mode > Budget Location.
-
Fill out the Budget Location template according to the instructions listed in the Field Description tab.
-
Delete any optional (gray) columns not being used.
-
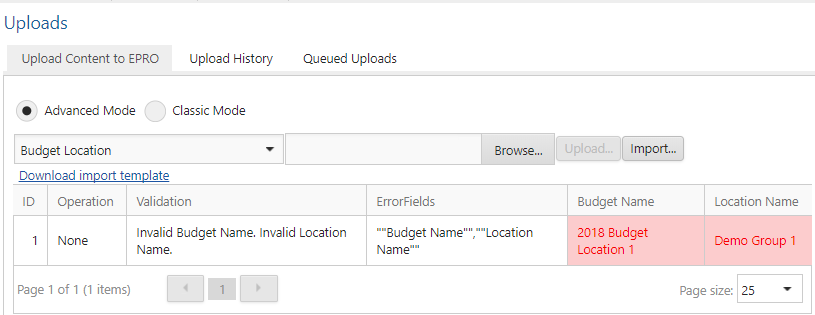
The Budget Name must be an exact match to what was loaded in the budget template.
-
The Location Name must be an exact match to what is configured in the EPRO system(reference the location upload report if necessary).
-
If you need to assign locations for multiple budgets you may do so in one upload.
-
-
Save the file as an XLS file.
-
Upload the template.
-
Tools > Upload > Advance Mode > select Budget Location from the drop down selector.
-
-
Browse for the file you just created > click Upload.
-
If errors are found during the upload process, there will be error messages in red on the screen.
-
-
If no errors are found after uploading the Budget Location file, click Import. You will be prompted to be re-directed to the history tab while the importing of the file runs.
Vendor Upload
-
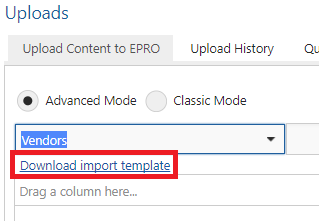
Go to Tools > Uploads > Advanced Mode > select Vendors from the drop down > click Download import template to download the Vendors spreadsheet template.
-
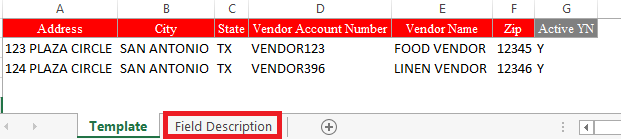
Fill out Vendors template according to the instructions listed in the Field Description tab.
-
Any optional (gray) columns that are not used need to be deleted.
-
Multiple vendors can be added to the system at once using one Vendors template. Each row that is filled out will represent a new Vendor account.
-
-
Save the file, using any naming convention, as an XLS file.
-
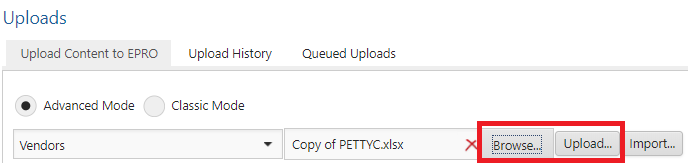
Go to Tools > Uploads > Advanced Mode > select Vendors from the drop down > Browse for the file you created > click and Upload the template to the EPRO system.
-
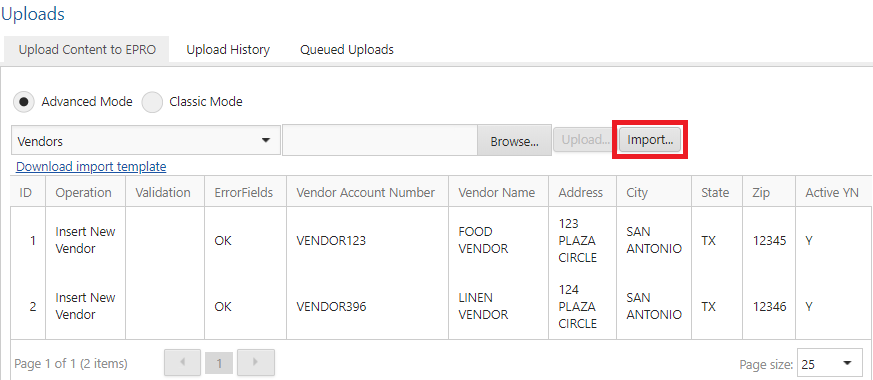
If no errors are found after uploading the Vendors file, click Import.
-
If errors are found during the upload process, there will be error messages in red on the screen. Review the error messages and correct on the Budget file previously created.
-