.png)
A Project is generally setup by creating a shell and then assigning other related entities, such as Locations or units, Budgets, people, and documents. Below is a general outline of the steps you should take to setup your project.
Create a Project
There are two primary methods for creating a project. One is to create a project manually, which includes setting up all details associated with the project such as budgets, users, forms, and deadlines.
-
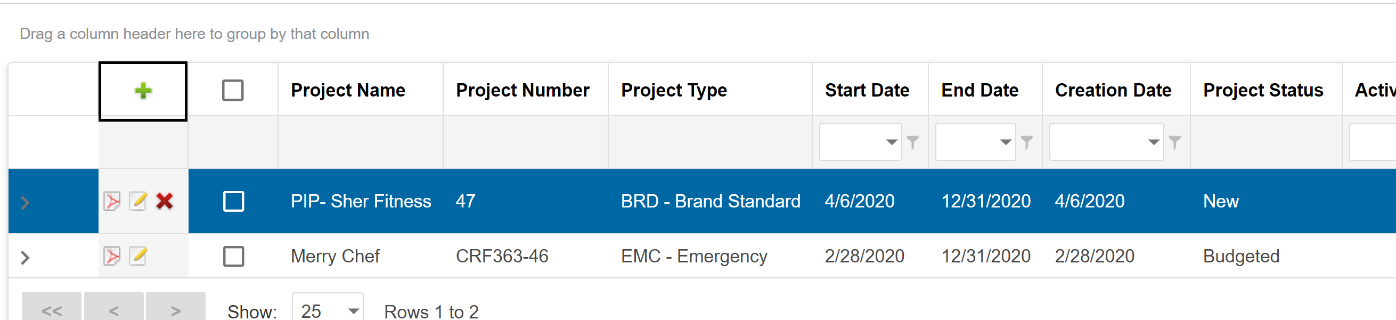
Go to View > Capital Projects > Project List.
-
Click the green plus sign.
-
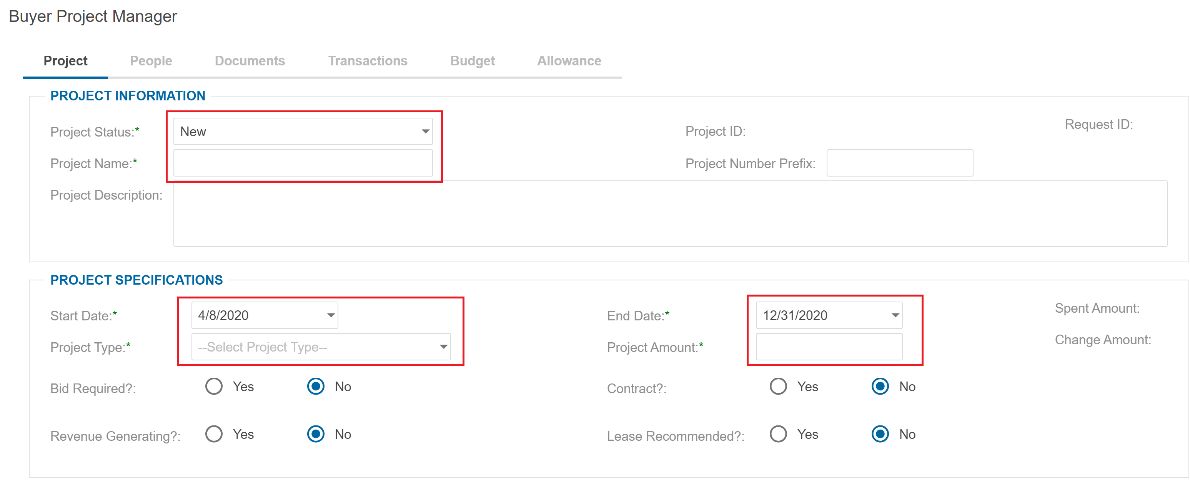
Fill in all field designated by an asterisk.
-
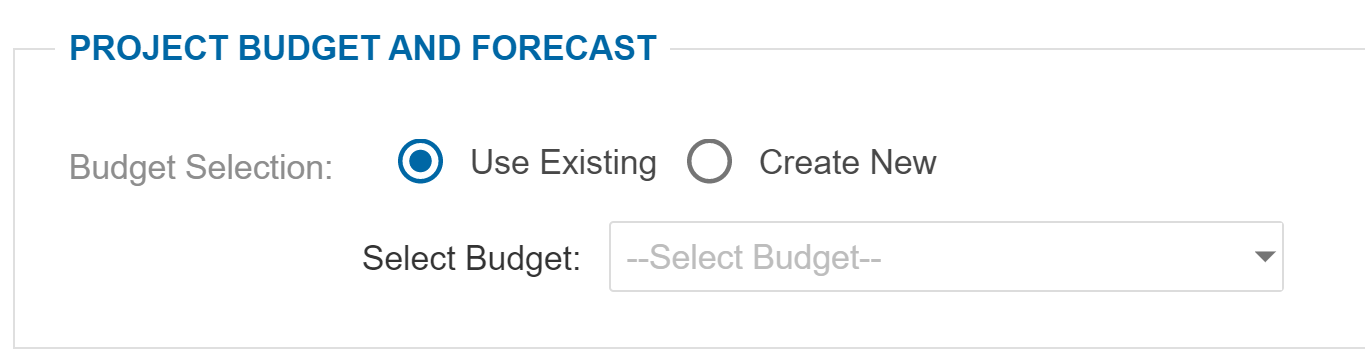
Select a budget for the project. Budgets can either be a one project to one budget or multiple projects to one budget.
-
Select a budget period.
-
Click Save.
-
After a project has been saved, you can use the other tabs at the top (People, Documents, Transactions, Budget, & Allowance) to edit and view other details related to this project.
Note
A Project can have one of seven statuses depending on the progress in its life cycle. The Accounting Team is expected to update the Closed status depending on the project's actual state.
-
New - The Project is drafted by the project manager and is waiting on additional details and not ready for approval
-
Pending - The Project request has been submitted and is pending approval or additional details
-
Budgeted - The Project has been approved and a budget is assigned but no transactions have yet been recorded against the Project
-
Active - The Project is approved and transactions are actively being added and reconciled
-
Completed - The Project is completed by the Project Manager
-
Closed - Project has reached the end of its life cycle and is complete
-
Declined - The Project has not been approved for completion
Edit a Project
Once a project is saved you have the ability to configure the project you your requirements.
People
-
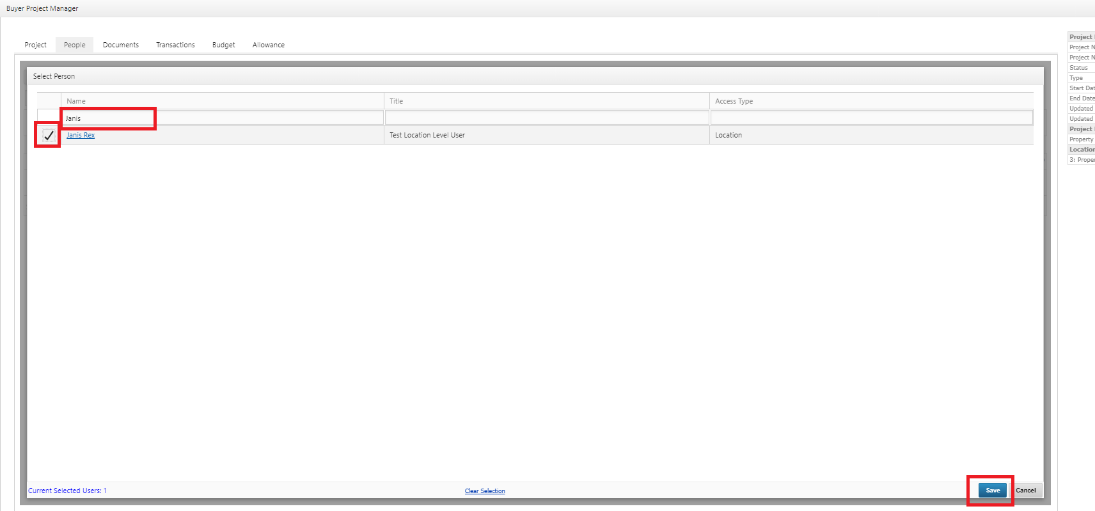
To add a person to the People tab, select the green plus sign.

-
Search for an individual in the search bar, place a check mark next to the name and select submit. You can search for multiple people and select them at one time.
-
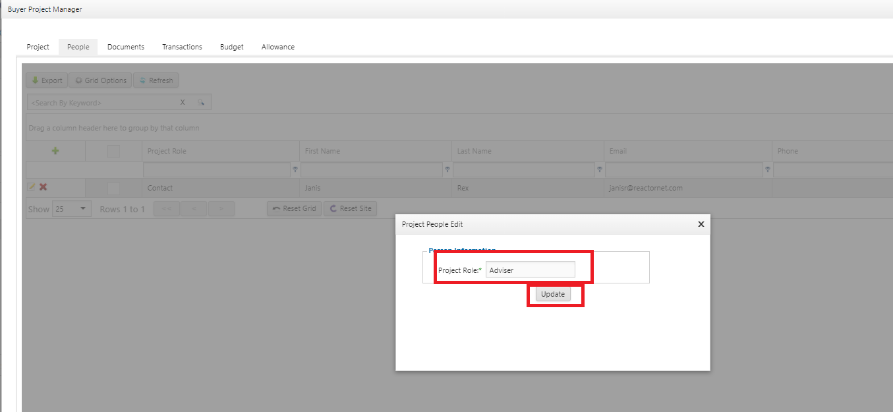
To change the project role select the edit icon

-
Fill in the role and select update.
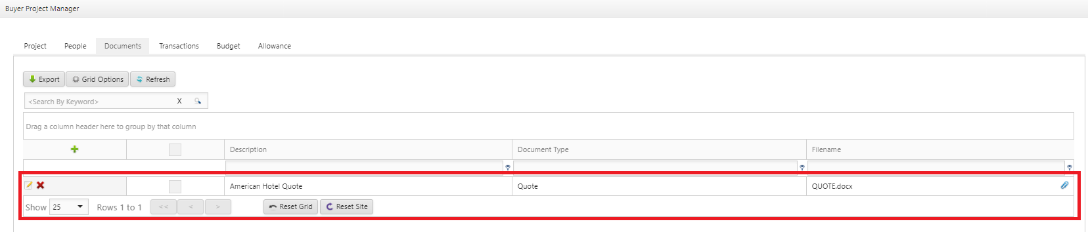
Documents
-
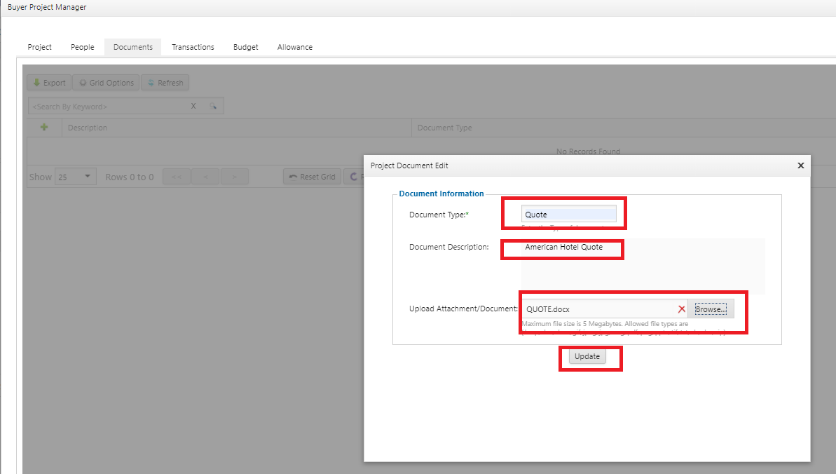
To add a document to the Document tab, select the green plus button.

-
Complete required fields and select Update.
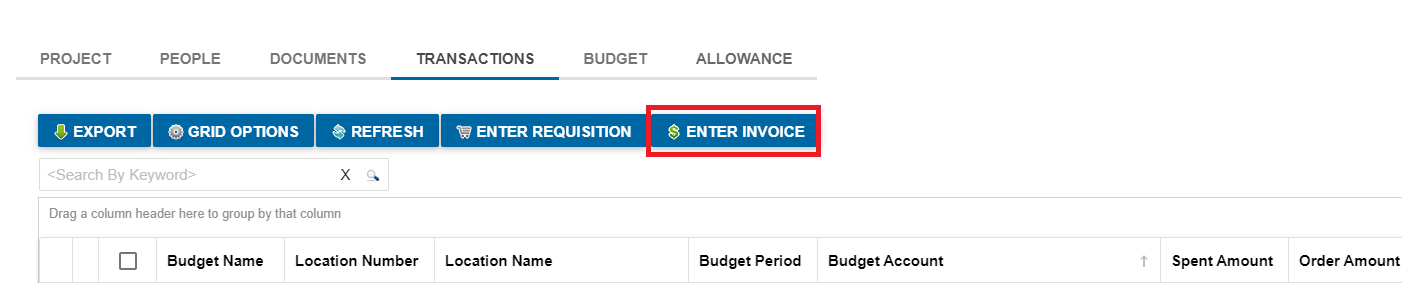
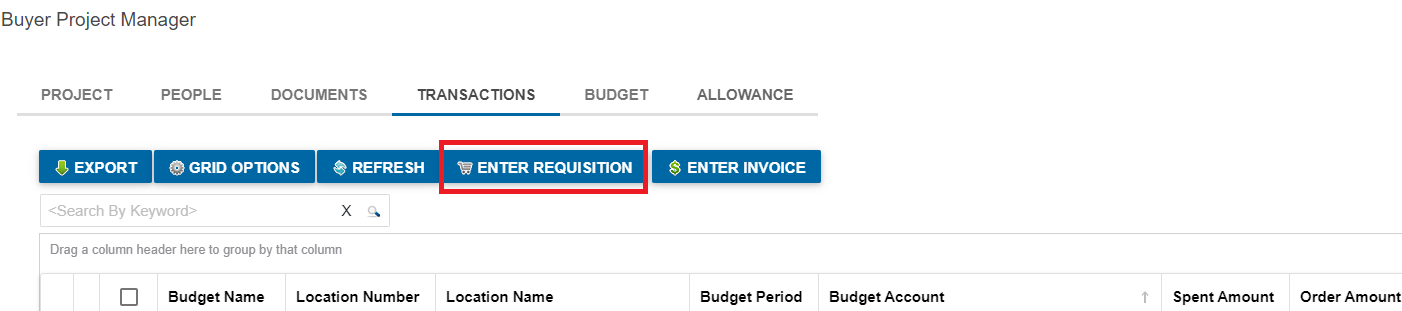
Transactions
The Transaction tab will be updated automatically when purchases as applied to the project.
-
Click the Enter Invoice button to add an invoice to this project.
-
You can also submit an invoice by following the Invoice Entry instructions.
-
Requisition can also be added to the project. Click on the Enter Requisition button to begin that process. Follow the instructions on the Requisition Form help for additional information.
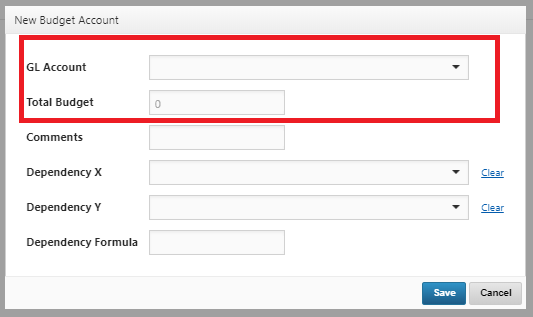
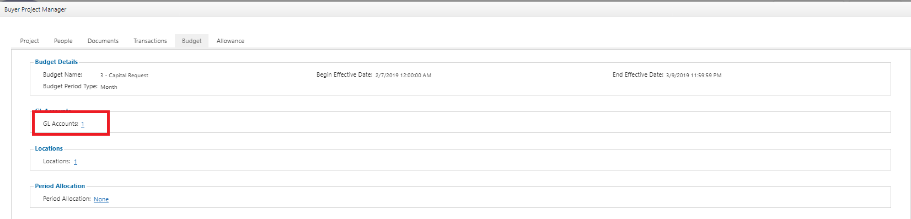
Budgets
-
To update the budget in the Budget tab select the number next to the GL Account.
-
Select the budget that you would like to apply the project by selecting the green plus sign.
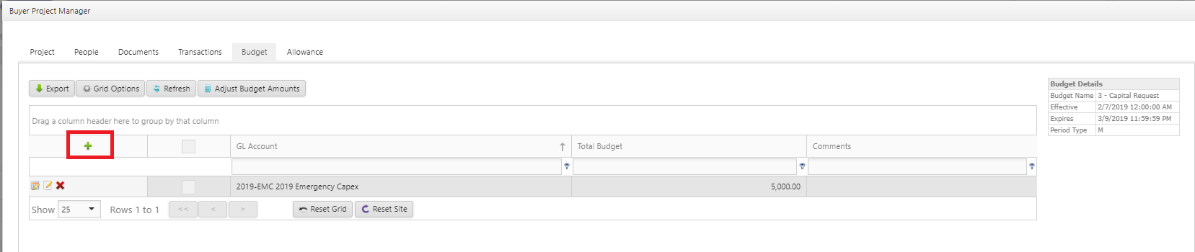
-
Fill out the necessary fields and select save to update the budget.