.png)
This screen contains a list of all users in your organization. You can easily search for users by their Last Name, First Name, User Name, Email, Title, or Access Level.
Managing Users
Adding a User
Adding a new user involves four simple steps. First, you need to create the user and assign them to a department. Next, you will need to email their login information. To add a user, you will need to provide their First Name, Last Name, Title, Email, Authorization level, and User Name. Each user is given a default password upon their first login.
-
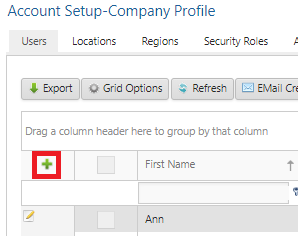
Go to View > Account Setup > Users.
-
Click the green plus sign.
-
The User Information tab will be selected by default.
-
-
Please fill in all necessary information in the fields marked with an asterisk.
-
Required fields include - First Name, Last Name, Title, Email, User Name, Access Type.
-
Access Type - you select is typically based on your job level. Front desk employees usually have Location access. Accounting specialists have Accounting access. General managers and others supervising multiple properties have Region access. Company leadership, executives, and other corporate office personnel have Corporate access.
-
-
Click Save.

-
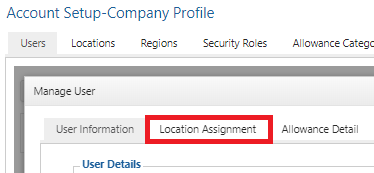
Click the Location Assignment tab.
-
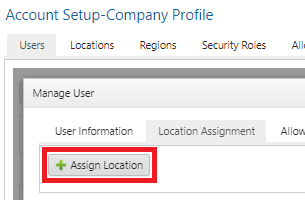
Click the Assign Location button.
-
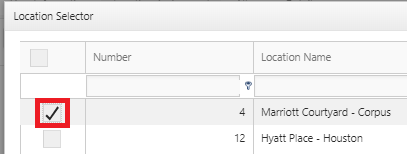
Select any locations this user should be assigned to by checking the boxes then click Save.
-
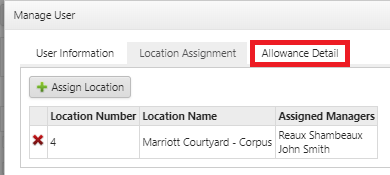
Use the red X to remove the user from any locations they should not be assigned to.
-
When the correct locations are assigned click the Allowance Detail tab.
-
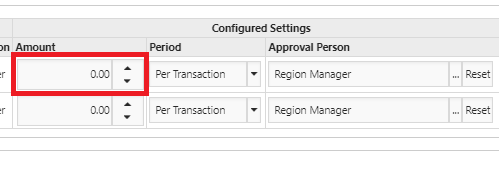
Make any required changes to buying power using the Amount field of a corresponding Allowance.
-
When you are satisfied with your new user's setup click Save then click the black X to close.
Editing a User
At times, it may be necessary to update a user's information. This can involve correcting their first or last name, updating their job title, adjusting their spending limit, or assigning a backup person. If a user relocates within your organization, make sure to update their information in EPRO to ensure they have access to the correct menu options.
-
Go to View > Account Setup > Users.
-
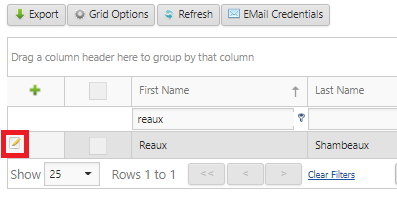
Search for the desired users via the column headers.
-
Click the Edit button next to the user you want to edit.
-
The User Information tab will be selected by default.
-
-
Edit any user details in the Manage User window.
-
Click the Location Assignment tab.
-
Click the Assign Locations button.
-
Select any locations this user should be assigned to by checking the corresponding boxes > Save.
-
The red X can be used to remove the user from locations they should not be able to access.
-
-
When you are satisfied with your edits click Save then click the black X to close.
Removing a User
When a user leaves your organization, it is important to remove them from the system. This will prevent them from accessing ordering or receiving capabilities.
-
Go to View > Account Setup > Users.
-
Search for the desired users via the column headers.
-
Click the Edit button next to the user you want to remove.
-
The User Information tab will be selected by default.
-
-
Click the Remove User button.
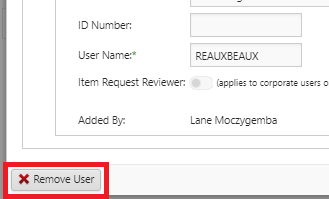
-
If you are sure you want to remove the user, type "remove" in the pop-up then click OK.
Important
A Location should always have at least one User assigned to it. When removing a User who is the only assigned User of a location, the person who is removing the User will automatically be assigned as a replacement user.
Browse all articles in this section: